The purpose of this series is to give a basic overview of the gameplay systems, specifications, and general knowledge regarding the current state of FINAL FANTASY XI ("FFXI") for those players who are thinking of returning to Vana'diel after spending some time away from the game.
Here in Volume 5, we are examining battle content in Vana'diel that is designed to really take your equipment to the next level, such as Ambuscade and Unity Wanted Battles. Also, we'll touch upon job points, which can be used to upgrade your character.
Ambuscade
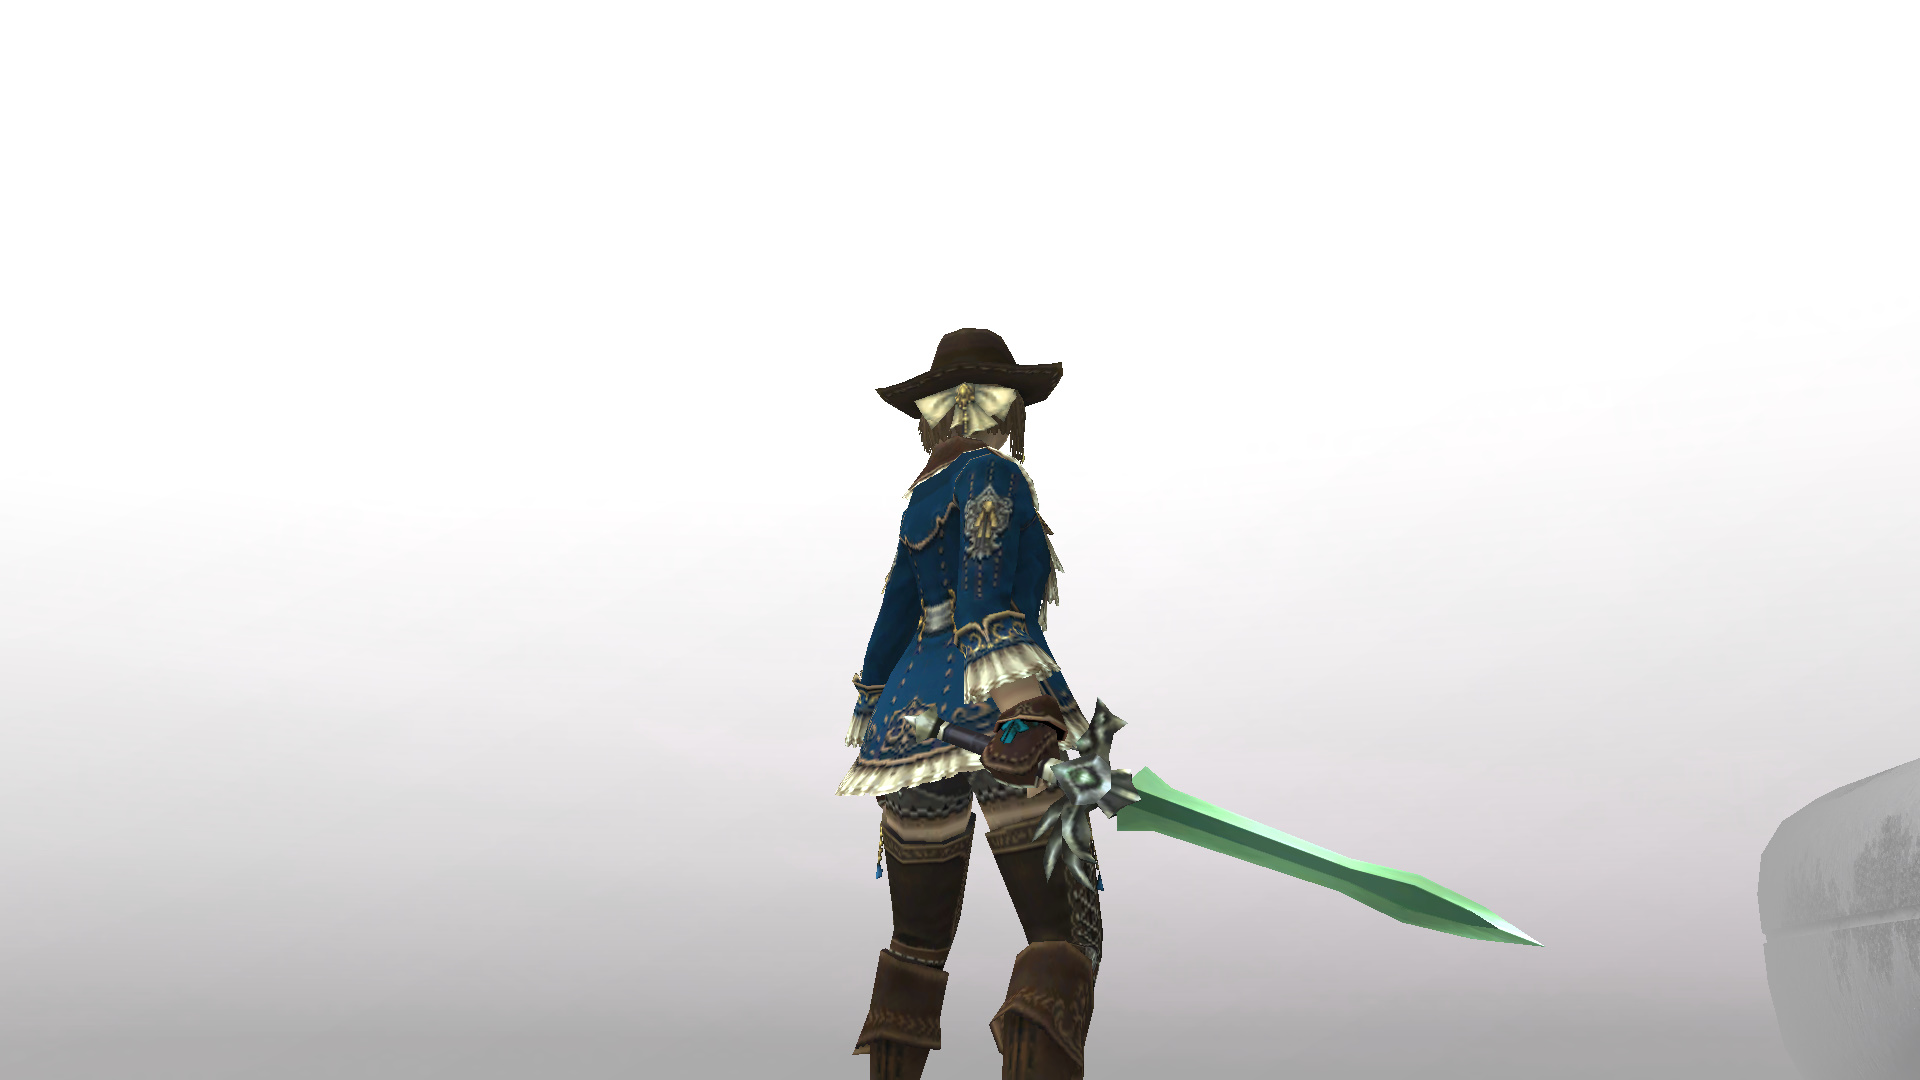
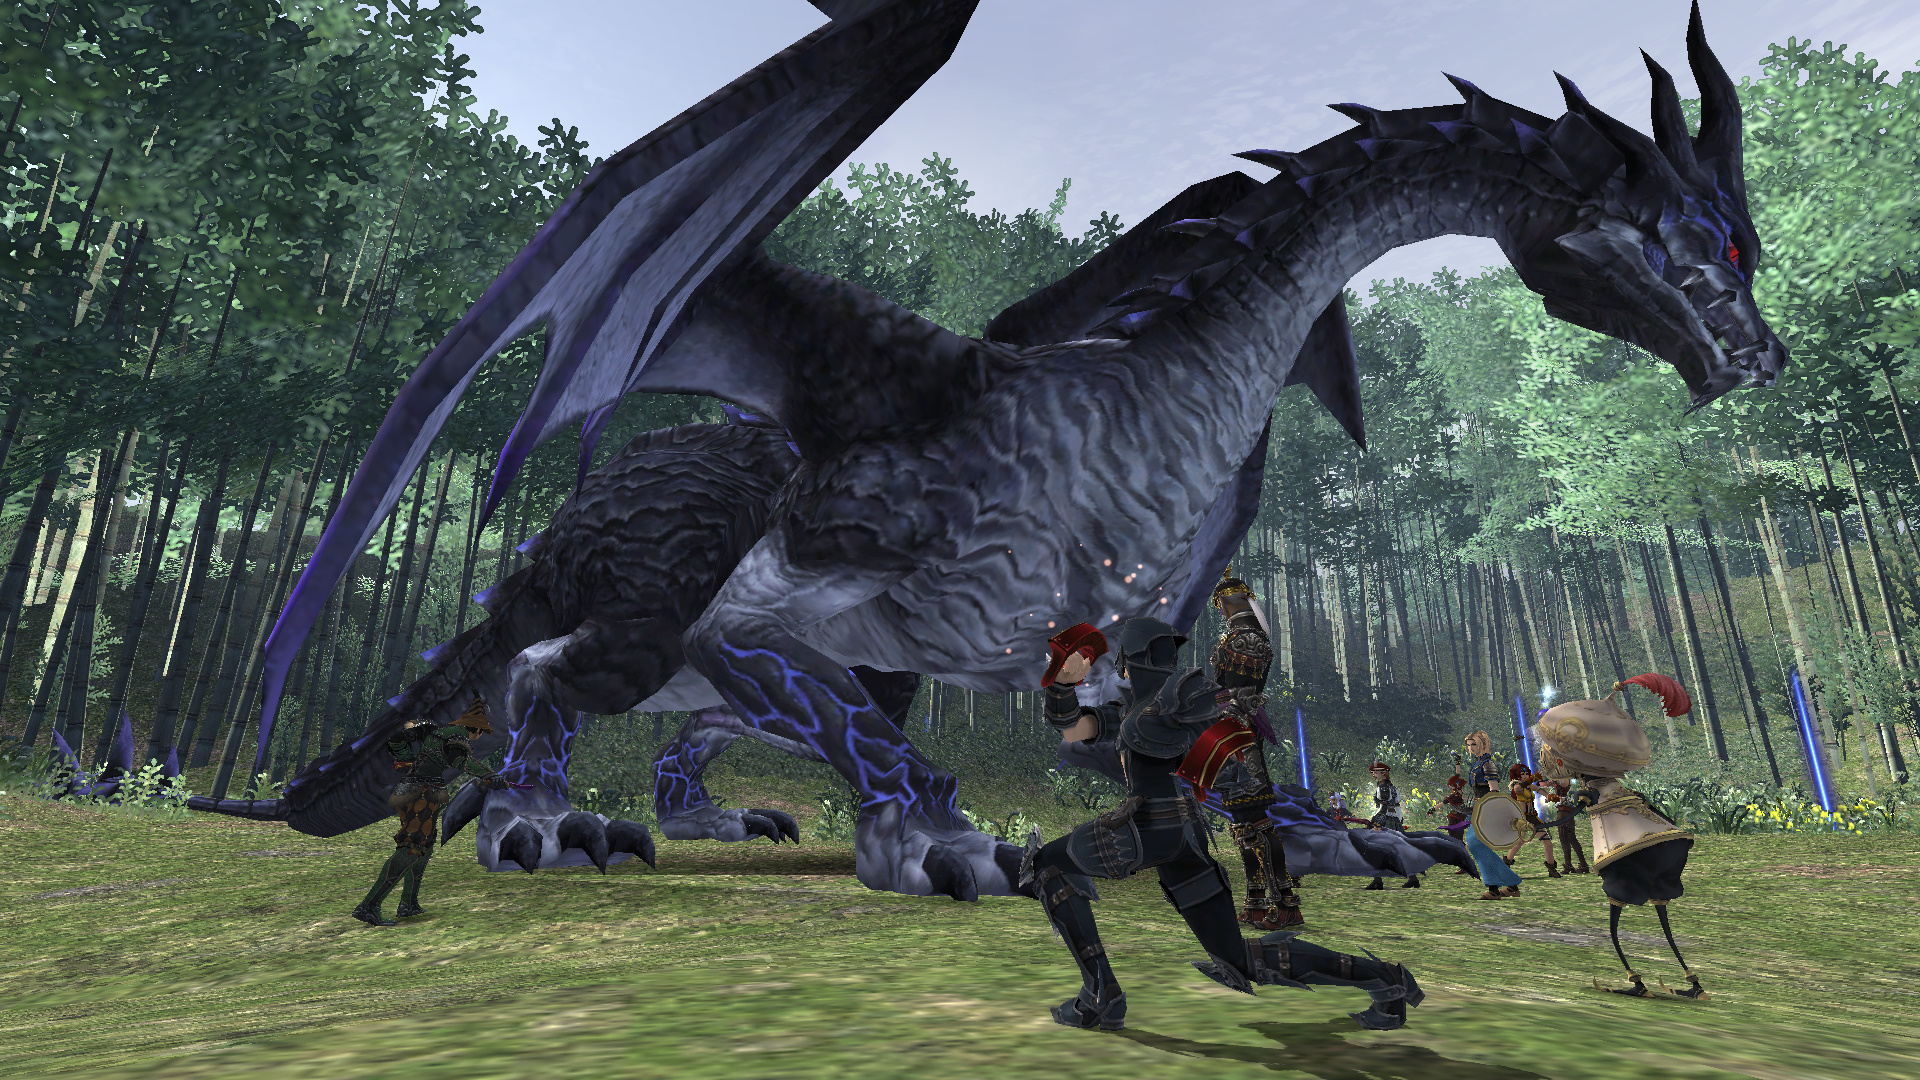
Ambuscade is battle content where the enemies change with every monthly version update. There are two types of battles to take on, each with their own content. There is Ambuscade, which is a battle you can take on solo (you may summon alter egos) or in smaller parties. There is also the more difficult Intense Ambuscade, which is designed for parties of six players. There are five difficulty levels for both types of Ambuscade, allowing you to adjust the difficulty to your party's makeup and skill level. If you win the battle, you'll receive special currencies known as Hallmarks and Badges of Gallantry, which may be exchanged for equipment and various items. Note that your Hallmarks and Badges of Gallantry are reset with each month's update, so be sure to exchange them for your rewards beforehand.
Requirements
・After accepting the "Stepping into an Ambuscade" Records of Eminence objective, speak with Gorpa-Masorpa in Mhaura (G-9) for an explanation about Ambuscade.
・Be in possession of either the "Ambuscade Primer Volume One" (for Intense Ambuscades) or "Ambuscade Primer Volume Two" (for Ambuscades) key items.
* You must have completed the "First Step Forward" objective in order to accept the "Stepping into an Ambuscade" Records of Eminence objective.
* The "Stepping into an Ambuscade" objective can be set from the Tutorial section of the Records of Eminence menu under Basics.
* All party members must have the necessary key item.
Content game flow
1. Complete either the "Ambuscade Primer Volume One" or Ambuscade Primer Volume Two" objectives to obtain the corresponding key item.
* The "Ambuscade Primer Volume One" and "Ambuscade Primer Volume Two" objectives can be undertaken from the Ambuscade category of the Records of Eminence menu.
* You can hold up to one each of the "Ambuscade Primer Volume One" and "Ambuscade Primer Volume Two" key items.
2. Examine the Ambuscade Tome in Mhaura (G-9) and select either Ambuscade or Intense Ambuscade as well as the difficulty level.
3. A message will be displayed when the battle is ready, so examine the Ambuscade Tome within the specified time limit to enter the battle.
* If you have the auto-transport function set to ON, you will automatically be taken to the battle once it is ready.
4. Defeat the specified monsters.
* You will not lose the key item if you are defeated, but it will be consumed if you win the battle.
5. Win the battle to acquire hallmarks and badges of gallantry¹.
1: Badges of gallantry are only earned when winning a battle with a party (excludes alter egos).
Achieving Victory in Ambuscade
If you win an Ambuscade battle, you'll receive special currencies known as hallmarks and badges of gallantry. Hallmarks can be exchanged for items and you will also earn rewards based on your total number of points for the month. Your hallmarks are not expended when receiving items that are based on your hallmark total.
Like hallmarks, your badges of gallantry can be exchanged for items. Your badges of gallantry have a dedicated item exchange list that is separate from your hallmarks.
Both types of currency have a limit to the number of items you can trade for each month, and the amount is reset with each monthly update.
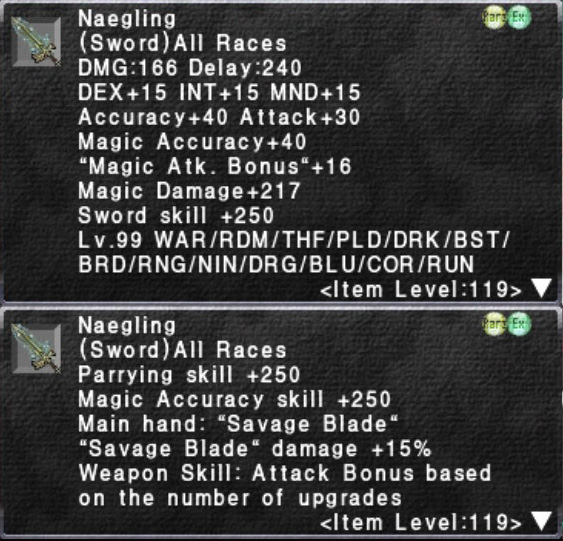
Ambuscade Weapons
You can acquire Ambuscade Weapons by trading an Ambuscade Voucher: Weapon to Gorpa-Masorpa. These weapons can then be upgraded in stages by trading the necessary amount of the relevant materials (Abdhaljs Nuggets, Abdhaljs Gems, Abdhaljs Anima, Abdhaljs Matter) to Gorpa-Masorpa. For the final stage, you will need a weapon from the Pulse Weapon set in addition to the required upgrade materials.
Sagasinger / Murasamemaru / Tenkomaru / Himthige / Aytanri / Adflictio / Girru / Gusterion / Dukkha / Ephemeron / Coruscanti / Asteria / Borealis / Ikarigiri / Delphinius / Chastisers / Router / Annealed Lance
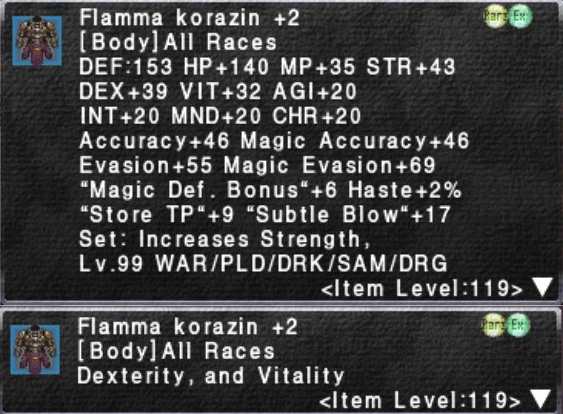
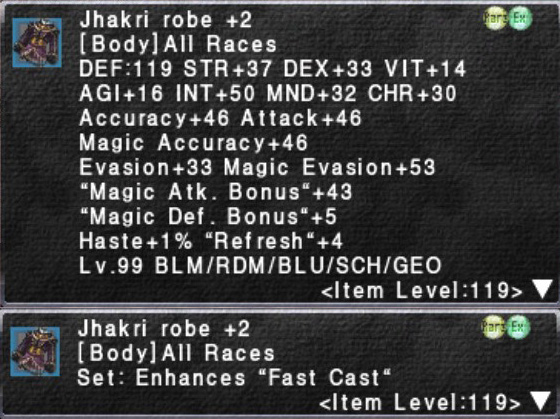
Ambuscade Armor
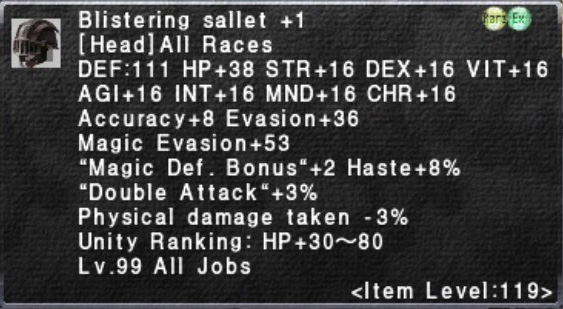
You can acquire Ambuscade Armor by trading an Ambuscade chit: headgear/bodygear/handgear/leggear/footgear to Gorpa-Masorpa. This armor is upgradeable to +2, and the upgrade requires either Abdhaljs Metal or Abdhaljs Fiber.
You can also directly acquire +1 versions of the armor by using an Ambuscade chit: (body part) +1. You can obtain Ambuscade chits: (body part) +1 as total hallmark rewards or by exchanging them for badges of gallantry.
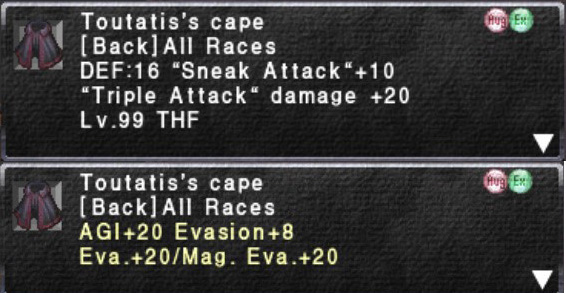
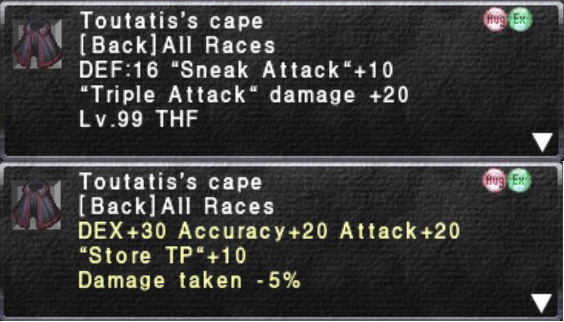
Ambuscade Job-Specific Back Armor
You can acquire Ambuscade Job-Specific Back Armor by trading an Ambuscade Voucher: back to Gorpa-Masorpa. This job-specific back armor can be augmented by using five types of materials (Abdhaljs Thread/Abdhaljs Dust/Abdhaljs Sap/Abdhaljs Dye/Abdhaljs Resin) to add the desired attribute. Additionally, since this equipment does not have the Rare attribute, you are able to possess multiple versions of the same equipment with different abilities.
Other items that can be exchanged for points
In addition to the equipment and upgrade materials shown here, hallmarks and badges of gallantry can be exchanged for various other items as well. These items include replica weapons designed to resemble the weapons carried by beastmen (Ambuscade voucher: replica), Shadowreign era currencies, and upgrade materials such as alexandrite, high-purity bayld, and heavy metal.
Unity Wanted
Unity Wanted is battle content that you can take on by spending the Unity accolades earned from the Unity Concord system. Examine the Ethereal Junctions that can be found in each area to take on a wanted notorious monster.
Requirements
・At least one party member must have accepted the requisite Unity Wanted objective.
※Although you can participate in the battle without accepting the Unity Wanted objective, you will not receive any spoils from defeating the monster.
※For alliance with seven or more members, the Wanted target's HP will increase for each participating member over six.
Content game flow
1. At least one party member must have accepted the requisite Unity Wanted objective.
2. Examine the Ethereal Junction in the target's location.
3. Defeat the Wanted notorious monster.
* Party members that have accepted the objective will expend accolades upon the start of the battle.
Unity Wanted Rewards
If you defeat the Wanted notorious monster after accepting the objective and spending the necessary accolades, you will be given a coffer for that notorious monster. Open the coffer by using it from your inventory to receive various items and specialized equipment.
The equipment that you can receive from these notorious monsters includes normal and high quality versions. If you receive normal quality equipment, you can upgrade it to high quality by trading the necessary materials with the Unity NPC. Also, on super rare occasions, you may directly receive high quality equipment. This notorious monster equipment includes additional upgradeable elements and can be augmented by meeting certain conditions.
Geas Fete
Geas Fete is battle content held in areas that you can travel to after progressing through the Rhapsodies of Vana'diel storyline (Escha - Zi'Tah, Escha - Ru'Aun, Reisenjima). When crafting Aeonic Weapons, you must have defeated all of the Geas Fete notorious monsters.
Requirements
・The party leader must be in possession of a "grisly trinket" key item corresponding to the appropriate Geas Fete notorious monster.
・All party members must have the "tribulens" or "radialens" key item.
* Grisly trinket is the overall term for key items that trigger a Geas Fete notorious monster to appear.
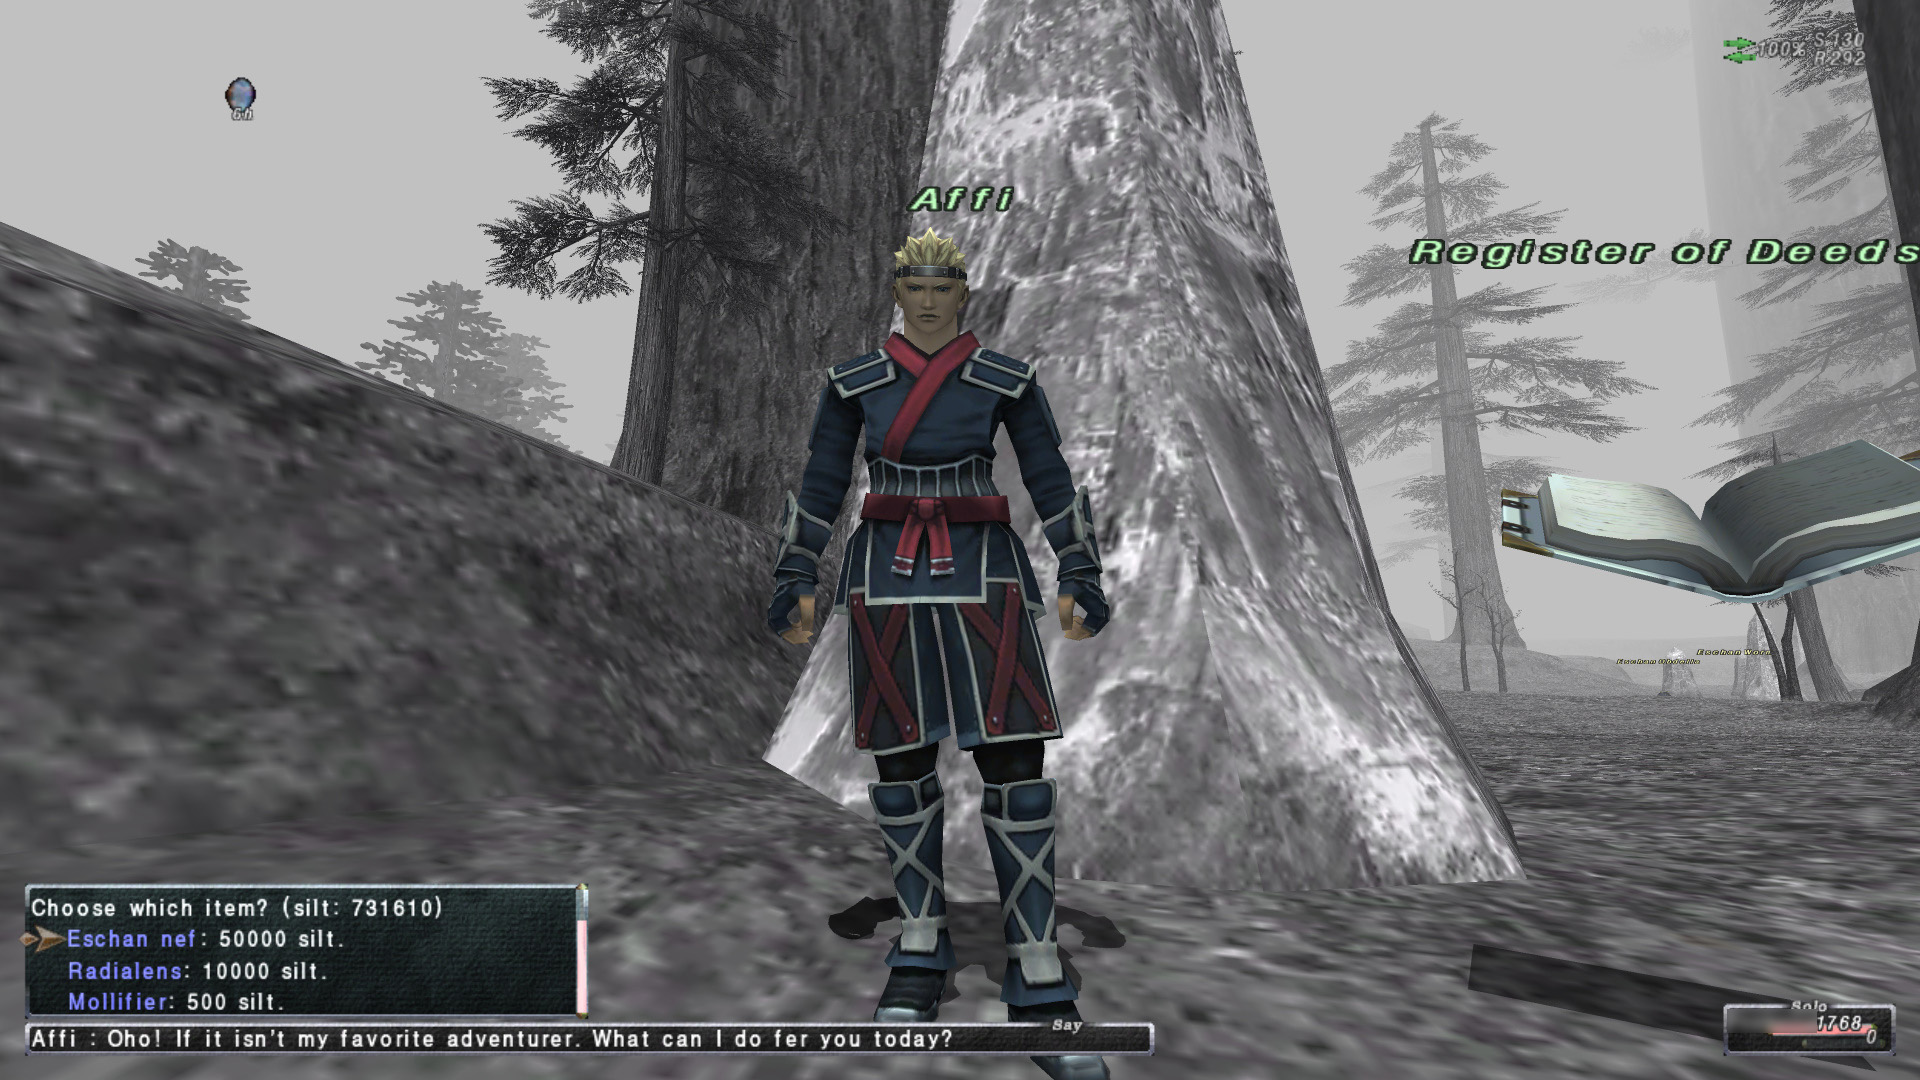
- Affi in Escha - Zi'Tah (F-10)
- Dremi in Escha - Ru'Aun (H-11)
- Shiftrix the Goblin in Reisenjima (F-12)
Content game flow
1. Trade the currency known as escha silt with the NPC near the entrance to each area for the "tribulens" or "radialens" key item.
2. Head for one of the ??? found within the area.
3. The party leader must examine the ??? while in possession of the "grisly trinket" key item.
4. Defeat the Geas Fete notorious monster that appears.
Geas Fete Rewards
After defeating Geas Fete notorious monsters, you will receive various spoils, including equipment and upgrade materials. Furthermore, some of the equipment and cursed equipment that has been purified by an Abjuration found in Escha - Zi'Tah and Escha - Ru'Aun can be enhanced with augments (choose from four augmentation paths) by speaking to Nolan in Norg (I-7) and using your eschalixir.
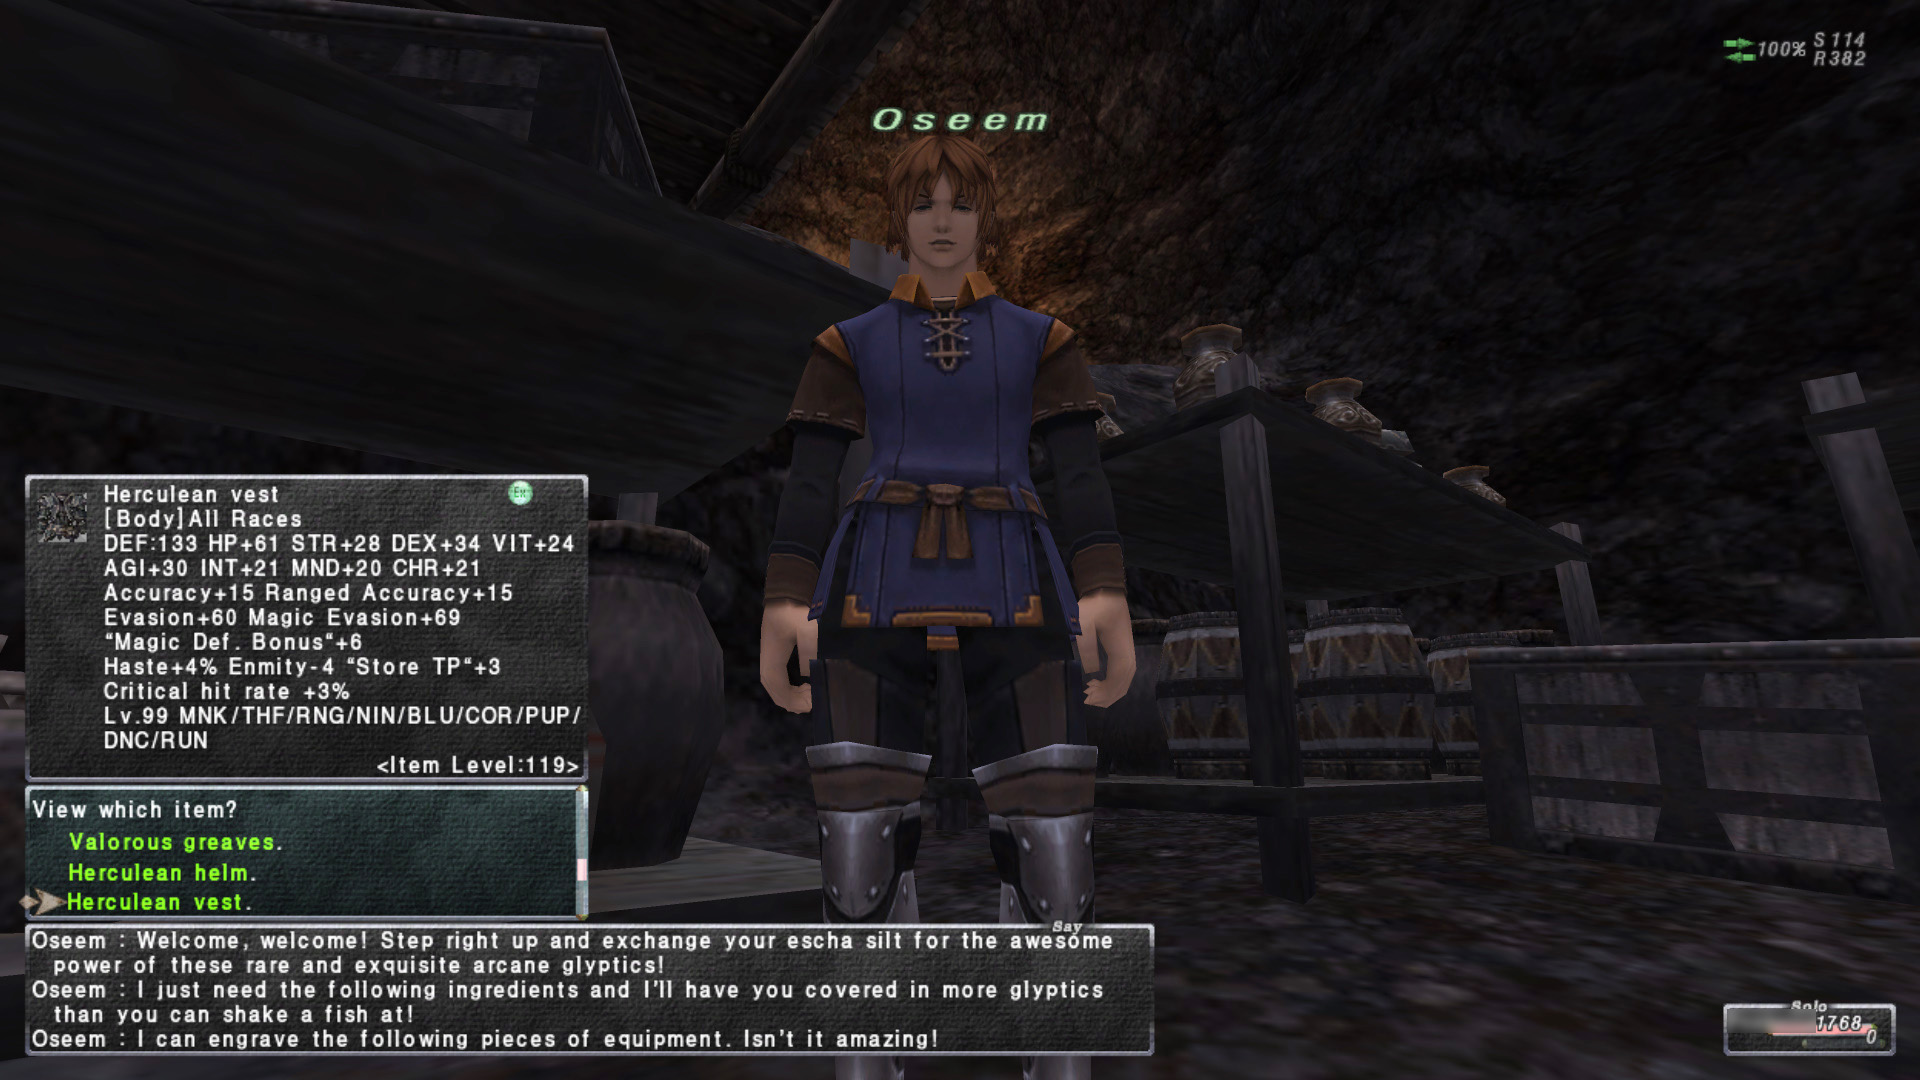
Similarly, for some of the equipment that can be found in Reisenjima, you can use the pellucid stones, fern stones, and taupe stones left with Oseem in Norg (I-7) to engrave your equipment with Arcane Glyptics. Although you can choose from various augmentation paths, the attributes and values will be assigned randomly. Also, by trading the equipment along with Dark Matter, you can receive a different Arcane Glyptic than the one described above.
* You can speak with each NPC to learn which equipment can be augmented.
Crafting Aeonic Weapons
Aeonic Weapons are ultra powerful weapons along the lines of Relic Weapons, Mythic Weapons, and Empyrean Weapons. These weapons are special in that upon obtaining the aftermath for the relevant weapon skill, you can activate the Ultimate Skillchains of Radiance and Umbra after meeting certain conditions. Teleport to Ethereal Ingress #8 in Reisenjima and speak to Temprix the Goblin to accept the task, and hand over the requested item after defeating all of the Geas Fete notorious monsters.
Conditions for Crafting Aeonic Weapons
・Complete the Rhapsodies of Vana'diel missions and obtain the "Scintillating Rhapsody" key item.

Domain Invasion
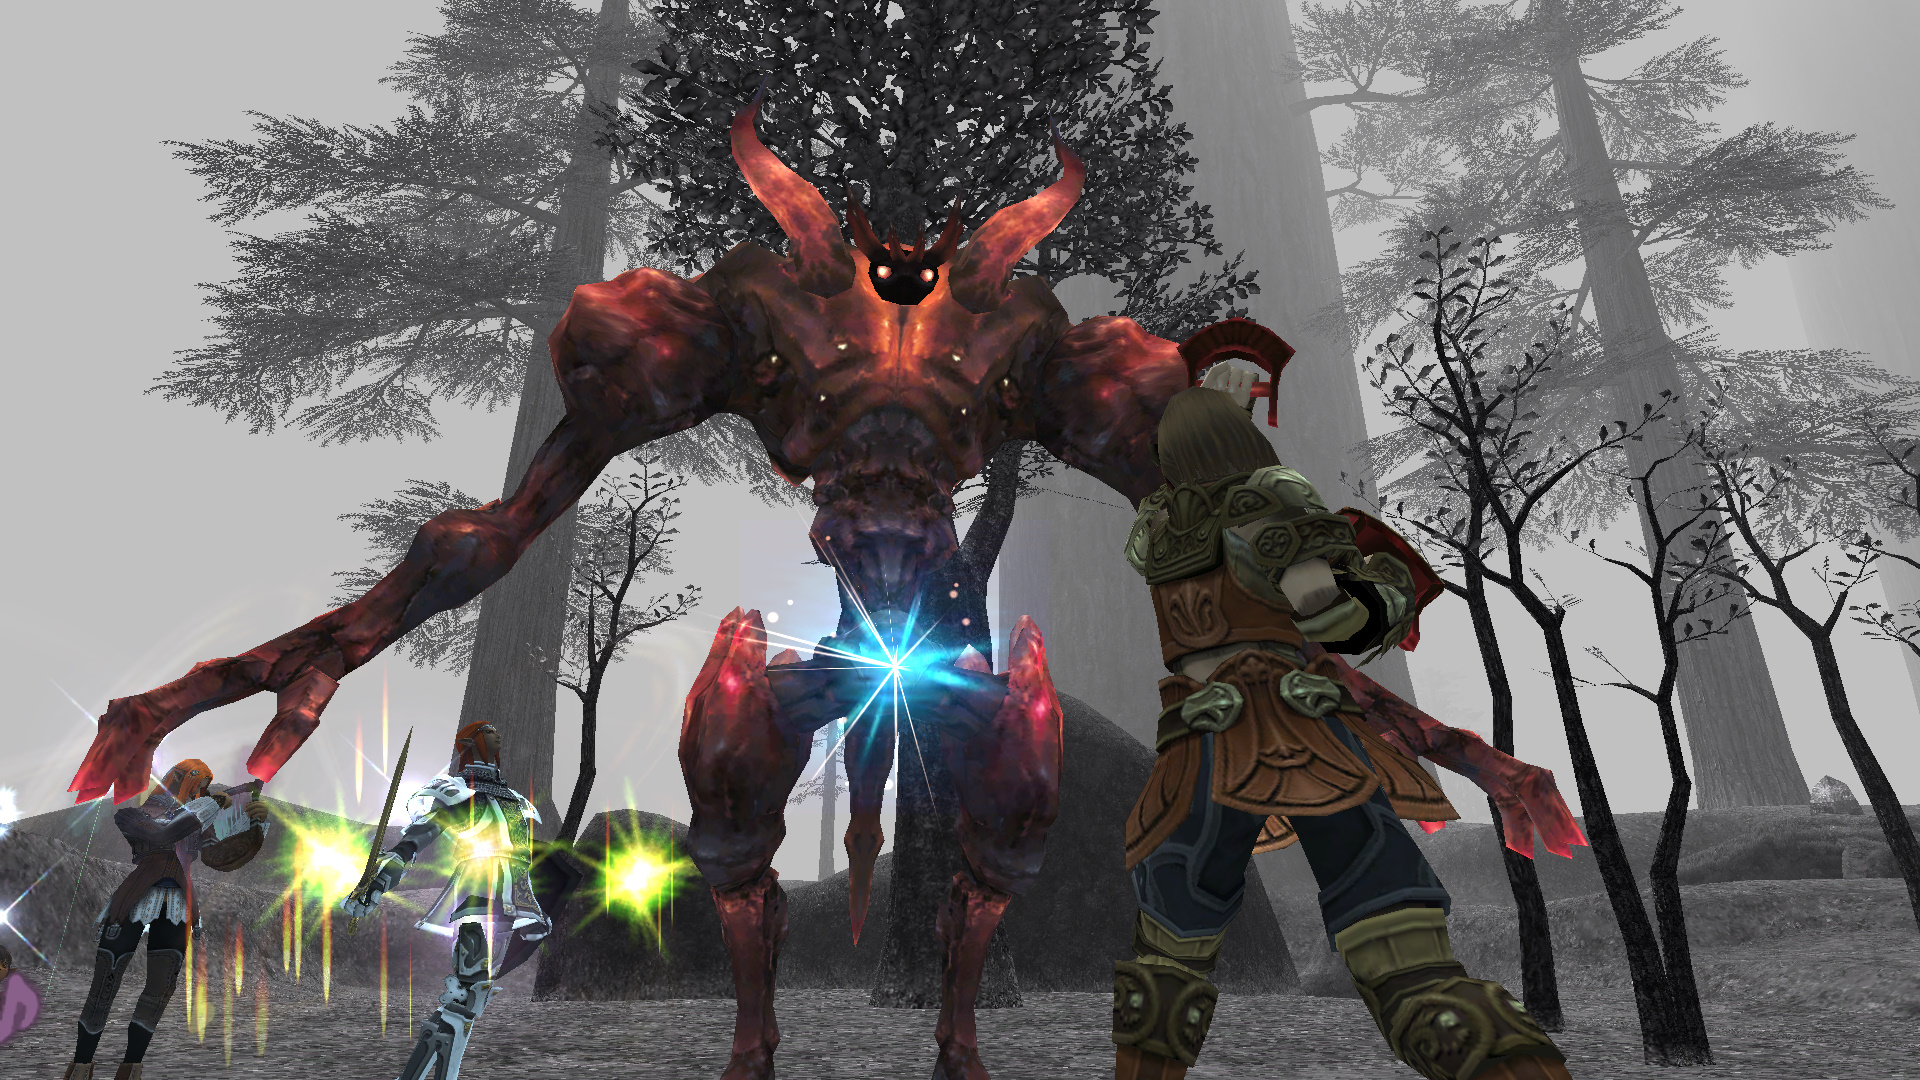
Domain Invasion is battle content that is held in the following three areas in order: Escha - Zi'Tah, Escha - Ru'Aun, and Reisenjima. Work together with the other adventurers in the area to take down a massive notorious monster. Additionally, an extra powerful notorious monster known as Mireu may appear on occasion. Successfully defeating Mireu will apply a bonus to the Domain Invasion rewards for the entire server, and can be further increased by continuously defeating Mireu. If you fail to defeat Mireu even once, the bonus for defeating Mireu on that server will be reset to zero.
Requirements
・Be level 99.
・Learn the relevant information from the NPC guide.
Affi in Escha - Zi'Tah (F-10)
Dremi in Escha - Ru'Aun (H-11)
Shiftrix the Goblin in Reisenjima (F-12)
Content game flow
1. Receive the "elvorseal" from the NPC located at the entrance to the area where the Domain Invasion notorious monster will appear.
* Your unity leader will occasionally give information about the notorious monster’s spawn location and time via the /unity chat channel.
2. Head for the area where the battle against the notorious monster will be fought. After receiving the elvorseal, you can select "Teleport to the target monster." to teleport immediately to the battle area.
3. Defeat the specified notorious monster.
Domain Invasion Rewards
You will receive an amount of experience points, capacity points, and escha silt based on your performance in the Domain Invasion. In addition, you will also receive a special currency known as domain points for participating in the battle. You can only receive up to 80 domain points per Earth day, resetting at 7:00 a.m. (PST) / 8:00 a.m. (PDT) / 3:00 p.m. (GMT) / 4:00 p.m. (BST), unless Mireu has been defeated 5 or more times on your server, then the daily cap is raised to 100 points instead. These domain points can be traded to Zurim in Norg (I-7) for special equipment, equipment that can be acquired from Geas Fete, and other items.
Leveling Up with Job Points & Gifts
Job points are used to level up your character past level 99, allowing you to boost ten different abilities specific to your job class in any order you choose. Once you have upgraded all of the abilities with your job points, you will be given the status of Job Master and receive a special title and abilities. Also, your character's appearance¹ will change.
1: Three stars will be displayed above your character's head. You can use the /jobmasterdisp on/off text command to toggle the display on and off.

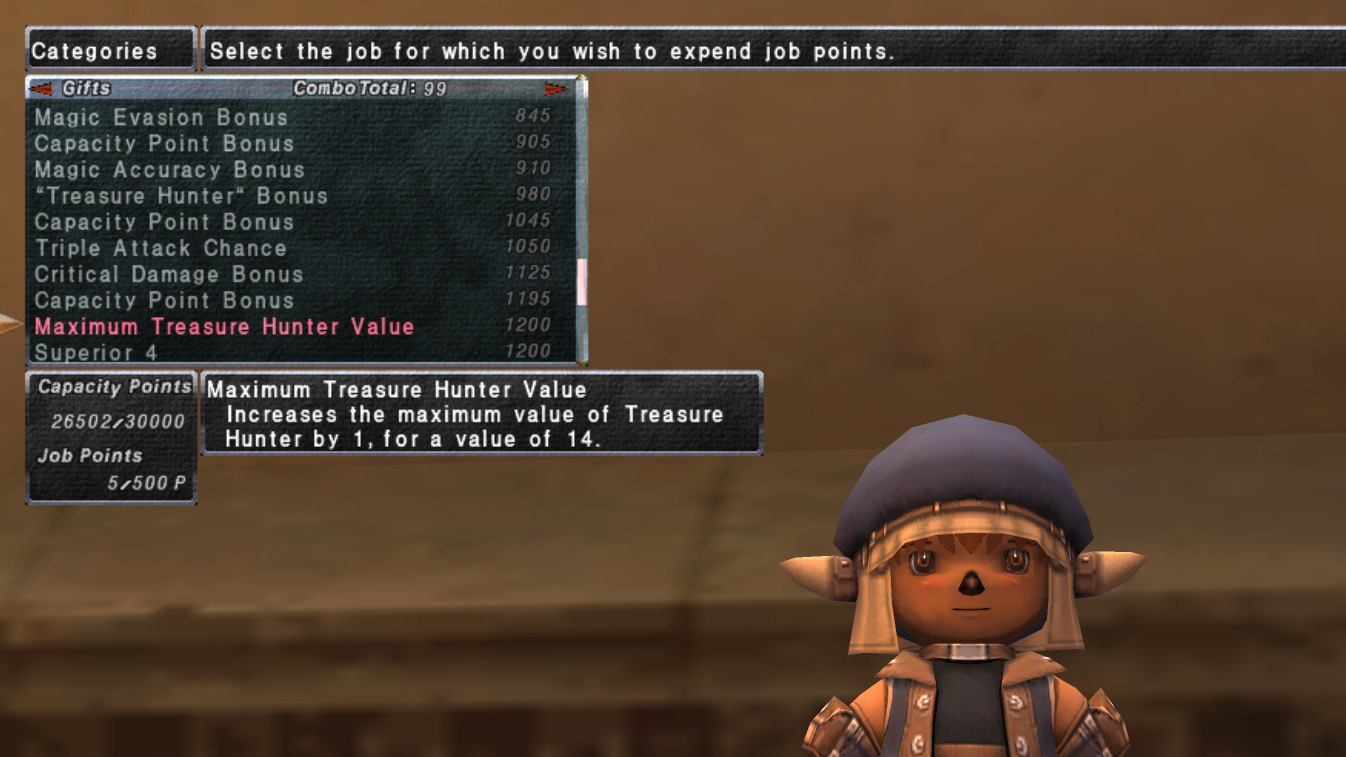
In addition, as you upgrade your job point categories, you will unlock abilities known as Gifts based on your total number of points. Gifts can boost your basic abilities or bring out special characteristics of your job, and can even result in learning new spells depending on your job class. Furthermore, you will be able to equip special equipment marked with the "Superior" status with the "Superior" level designation based on the amount of job points that you have spent.
Acquiring the "job breaker" key item
Once you have met the requirements listed below, speak to the Nomad Moogle in Ru'Lude Gardens (H-5) to receive the "job breaker" key item.
* You must be in possession of the "limit breaker" key item.
* You must have a job level of 99.
Job Points Acquisition and Usage
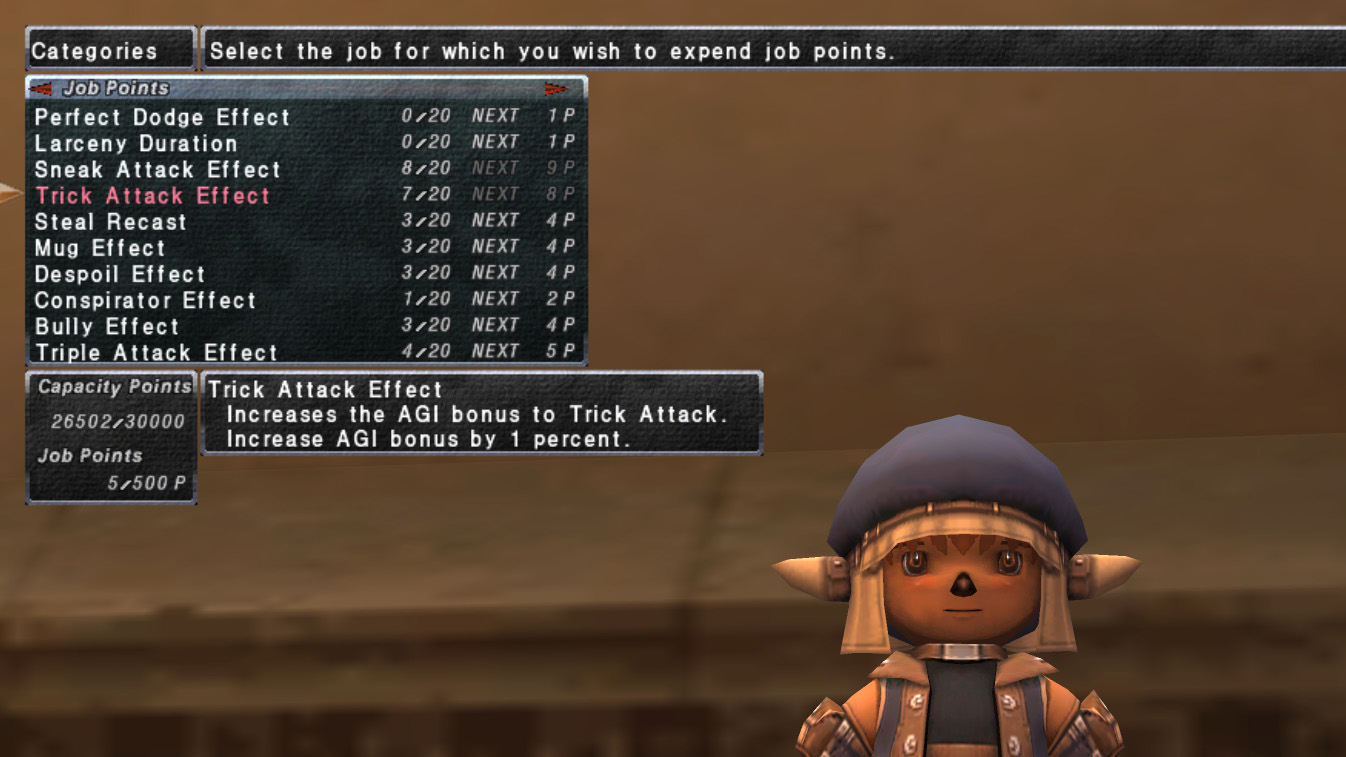
After obtaining the "job breaker" key item, you will receive capacity points upon performing actions such as defeating monsters of a certain level or completing specified Records of Eminence objectives. Once you reach 30,000 capacity points, you will automatically receive 1 job point. Job points can be used in locations such as a Mog House or Mog Garden, and you can go to the main menu within the Mog House and select Status > Job Points to upgrade whichever category you like.
Capacity Point Bonuses
There are various bonuses that can be applied to the capacity points that you earn, and they can also stack to earn you even more points. The following are some of the ways to earn bonuses.
・Gifts
・Rhapsody key items (Rhapsodies of Vana'diel)
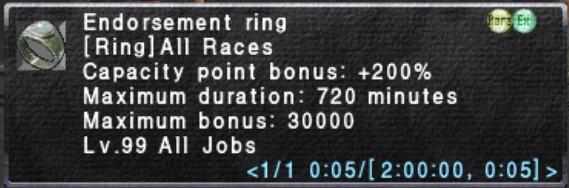
・The "Commitment" status (an effect received by equipping equipment with relevant “Enchantment” effects such as a Trizek Ring or Endorsement Ring).
・Equipment marked with "Capacity Point Bonus+"
・Rewards for completing certain Records of Eminence objectives
・Use the Corsair's Roll job ability
・Summon the alter ego Kupofried
・Moogle bonuses & Chacharoon's cheers
・Unity Concord Ranking Bonus
・Chain Bonus
・Chain Capacity Point Bonus Campaign
...and more
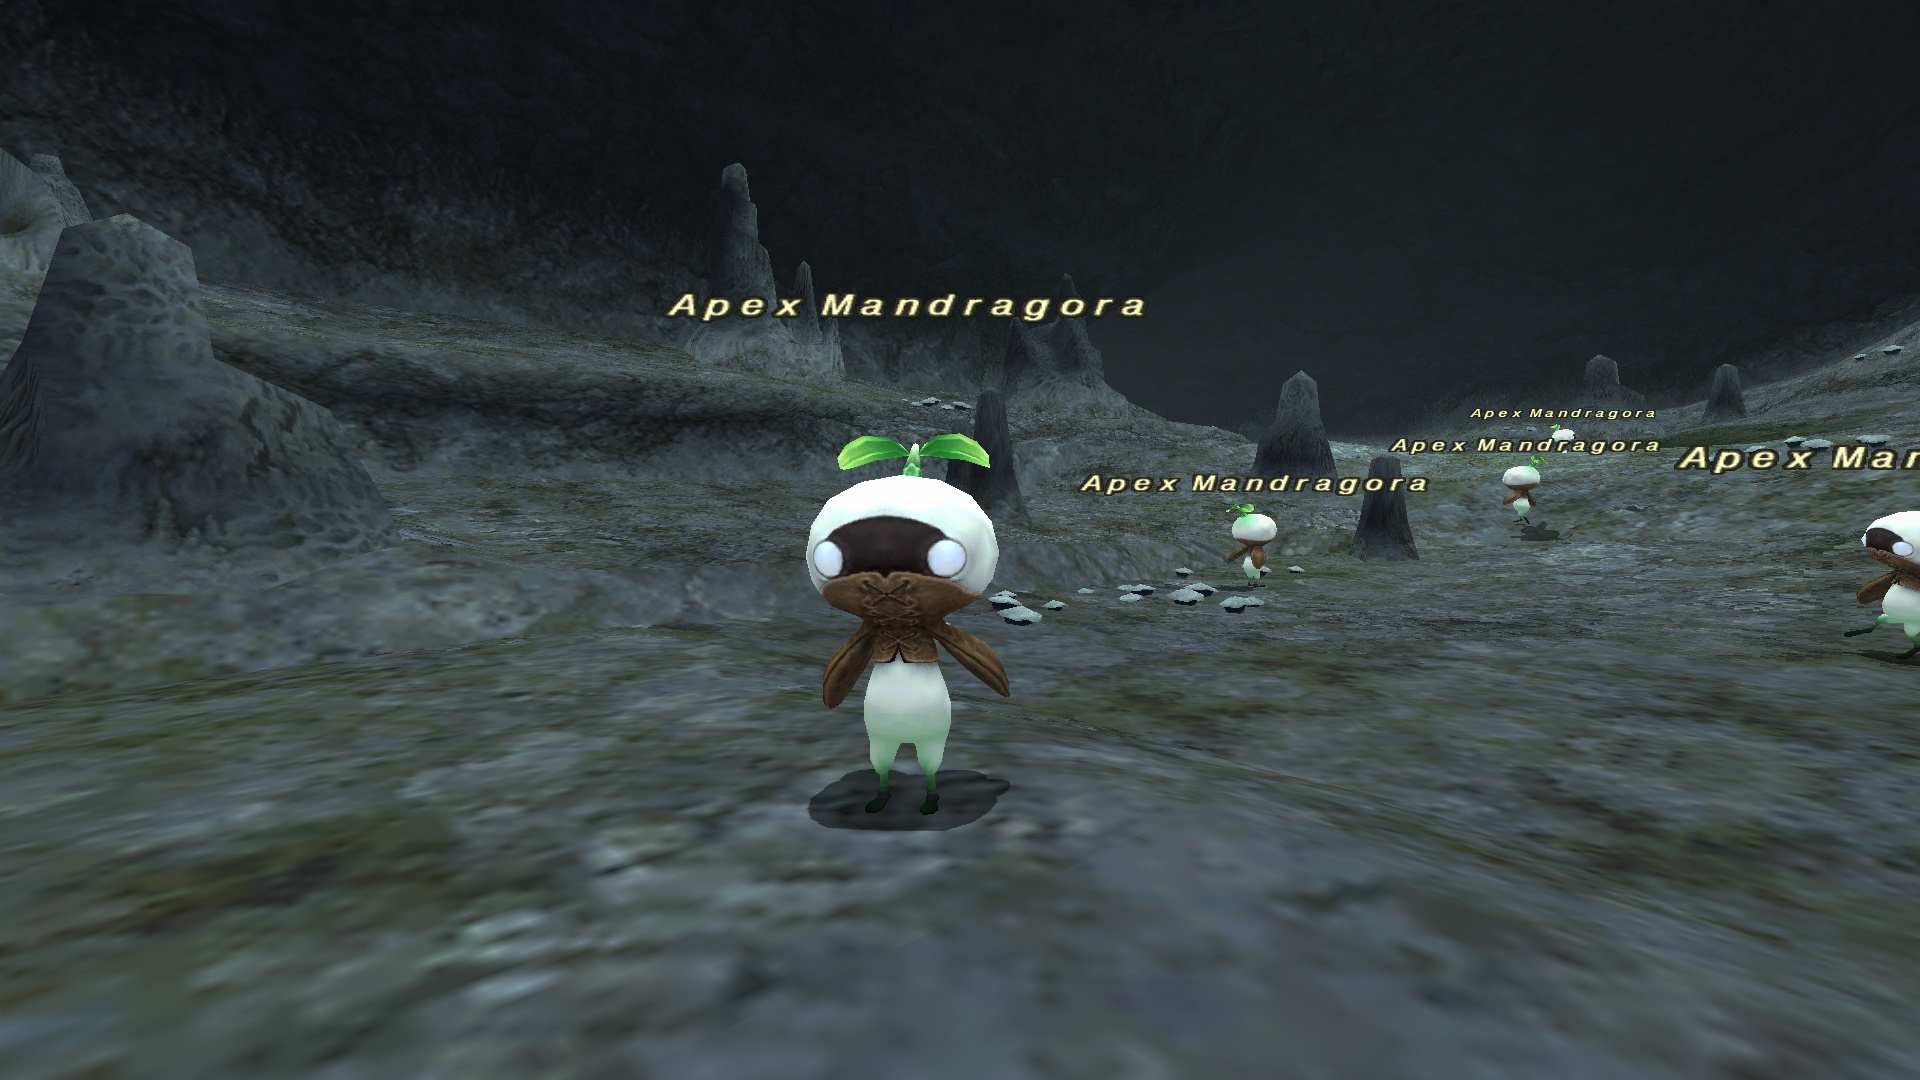
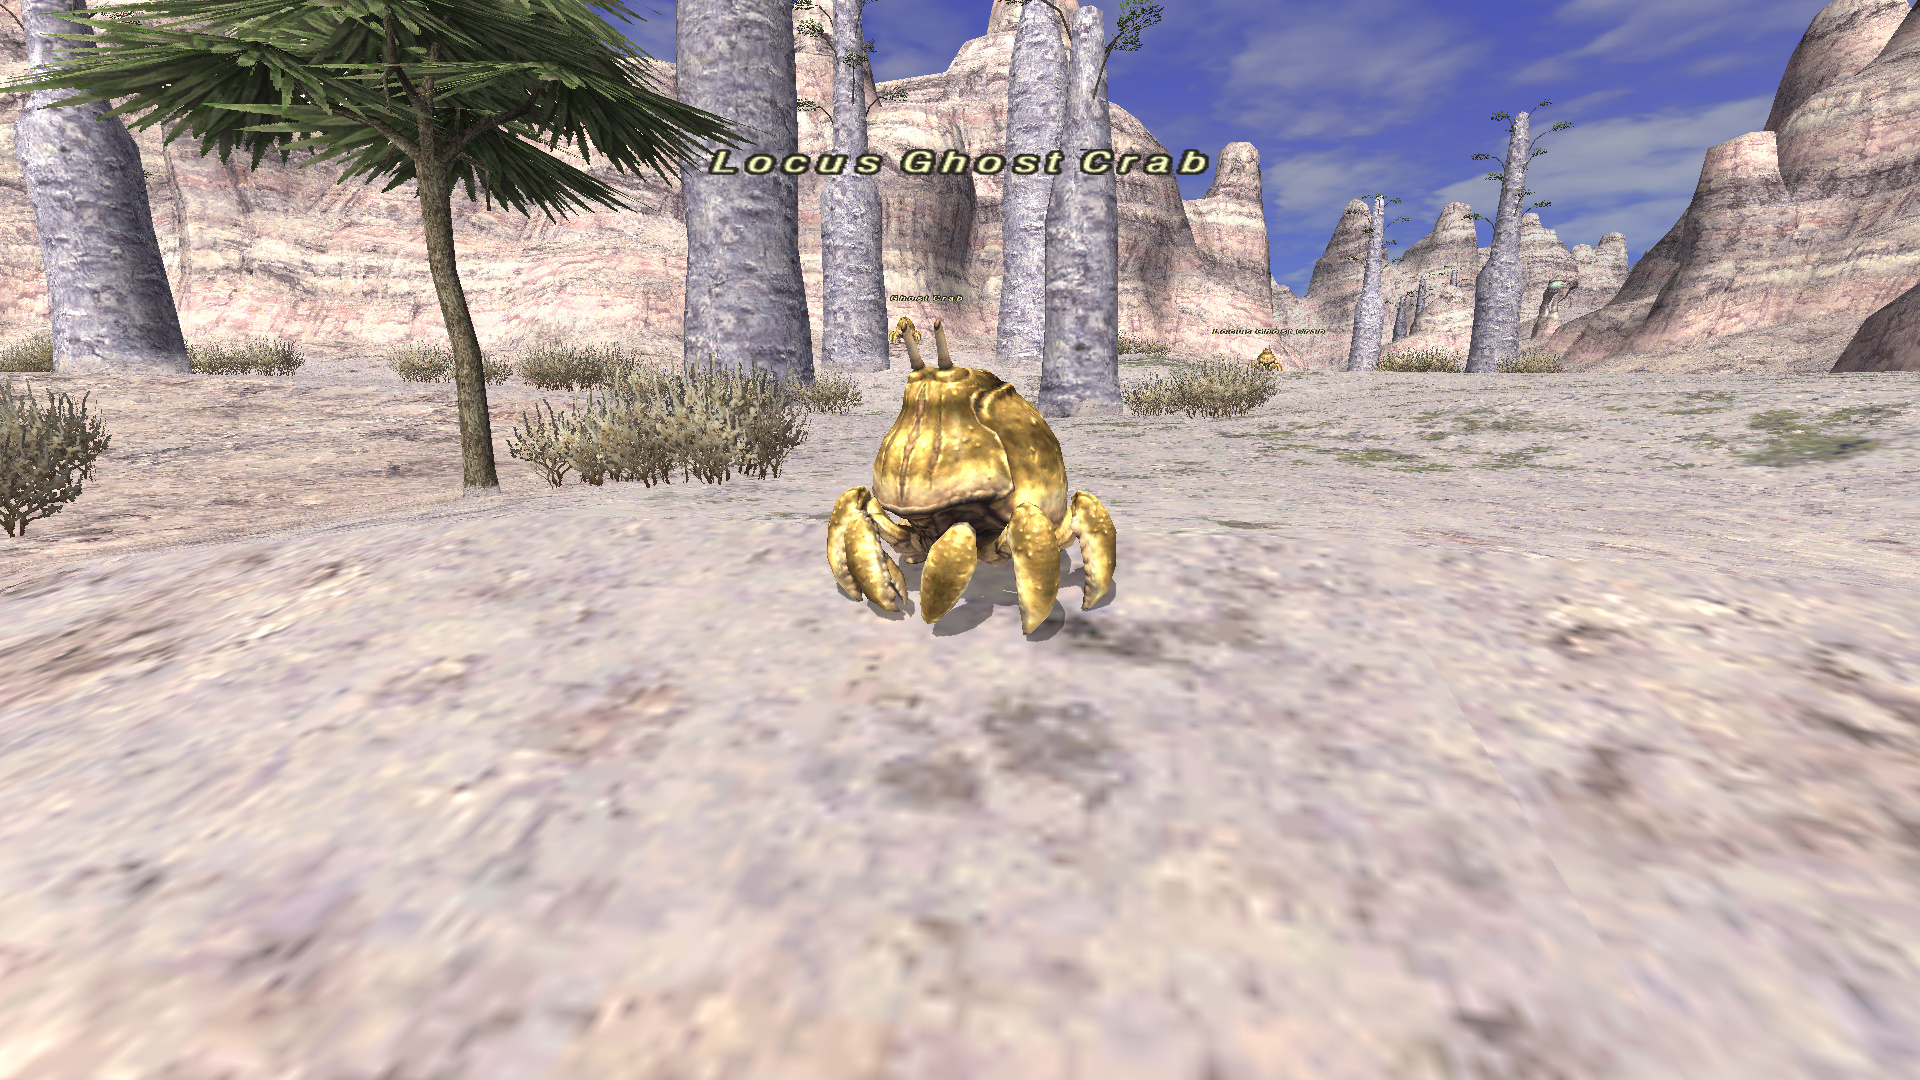
Monsters that earn you the most capacity points
Monsters whose names start with "Apex" or "Locus" will have more HP than normal monsters, but will also give you more capacity points when you defeat them. Furthermore, "Locus" monsters will have more HP than "Apex" monsters and are resistant to area of effect attacks.